Tag: Monthly Challenges

Sweet And Sour Kingfish Steak Dreamlight Valley Recipe...
Cooking in Disney Dreamlight Valley provides players with a great way to restore energy, earn Star Coins, and complete village quests. Among the diverse entrees available, the Sweet and Sour Kingfish Steak stands out as a unique three-star meal that combines tangy and sweet flavors. Understanding where to collect the required ingredients will make preparing this dish quick and efficient.
Required Ingredients for the Recipe
To cook the Sweet and Sour Kingfish Steak, you need three specific ingredients. The recipe calls for one Kingfish, one Lemon, and one Sugarcane. Combining these items at any cooking station along with a piece of Coal will yield the completed dish.
Where to Find Kingfish and Harvesting Fruits
Catching a Kingfish requires visiting Dazzle Beach, where it can be caught by fishing in blue ripples. Lemons are easy to forage from trees located in both the Glade of Trust and the Forest of Valor. Gathering these two core components takes minimal effort once those biomes are unlocked.
Obtaining Sugarcane on Dazzle Beach
Sugarcane can be acquired from Goofy's Stall on Dazzle Beach. You can buy fully grown Sugarcane directly or purchase seeds to cultivate them on your farm. Keeping a small stash of crops in storage ensures you are always ready for cooking sessions.
Benefits of Cooking Sweet and Sour Kingfish Steak
Preparing this three-star entree rewards players with a solid boost of energy when consumed. It can also be sold at Goofy's Stalls for a decent amount of Star Coins. Master this recipe to keep your character energized while exploring the valley.

How to Delete Profile on PS5: Remove an...
Managing the user accounts on your PlayStation 5 helps keep the system organized, frees up local storage, and protects personal data. Whether you are selling your console, giving it to a friend, or simply cleaning up unused guest profiles, deleting an account from the system is a straightforward process. This guide provides clear steps to safely remove any user profile from your console without losing permanent access to your PlayStation Network account.
Navigating to PS5 User Settings
To begin removing a profile, power on your PlayStation 5 and log into an active account on the home screen. From the top right corner of the dashboard, select the gear icon to open the Settings menu. Navigating through the system settings menu gives you access to full control over account management, security options, and console preferences.
Once inside the Settings menu, scroll down and select Users and Accounts from the list of options. This section allows you to manage active profiles, cloud saves, and login credentials across the entire system. From here, you can oversee all registered user profiles currently assigned to the hardware.
Removing the Profile From System Storage
Within the Users and Accounts menu, locate and select the Delete User option at the bottom of the list. You will see a list containing every profile currently installed on the console alongside its associated avatar. Highlight the specific profile you wish to remove and confirm your selection to initiate the deletion process.
A warning prompt will appear on the screen informing you that local saved data, screenshots, and video clips linked to that profile will be deleted from the system storage. Confirming the deletion will clear these local files while keeping your online PlayStation Network profile safe in the cloud. After confirming, the console will quickly remove the user profile from the home interface.
Understanding Saved Data and Cloud Backups
Deleting a user profile permanently removes local save files tied specifically to that user on the console. If you subscribe to PlayStation Plus, your saved game data is likely backed up in cloud storage automatically. You can always sign back into the same account in the future to restore game data and re-download purchased digital titles.
However, if the account did not utilize cloud storage, any unsaved local progress will be lost permanently once removed. It is recommended to manually back up important save files to USB or cloud storage before removing an account. Taking this precaution ensures that your valuable game progress remains accessible if you ever reinstall the profile later.
Managing Primary Console Sharing Settings
Before deleting a primary account from a PS5, it is wise to check your Console Sharing and Offline Play settings. Disabling console sharing on an account before removal ensures that your game library is properly unlinked from the device. This extra step prevents licensing issues if you plan to activate a new primary console elsewhere.
You can adjust these options by navigating to Users and Accounts, selecting Other, and choosing Console Sharing and Offline Play. Disabling this setting clears your primary status from the hardware safely. Following these steps ensures your account remains fully secure across all Sony PlayStation services.

How to Delete Profile on PS5: Remove an...
Managing the user accounts on your PlayStation 5 helps keep the system organized, frees up local storage, and protects personal data. Whether you are selling your console, giving it to a friend, or simply cleaning up unused guest profiles, deleting an account from the system is a straightforward process. This guide provides clear steps to safely remove any user profile from your console without losing permanent access to your PlayStation Network account.
Navigating to PS5 User Settings
To begin removing a profile, power on your PlayStation 5 and log into an active account on the home screen. From the top right corner of the dashboard, select the gear icon to open the Settings menu. Navigating through the system settings menu gives you access to full control over account management, security options, and console preferences.
Once inside the Settings menu, scroll down and select Users and Accounts from the list of options. This section allows you to manage active profiles, cloud saves, and login credentials across the entire system. From here, you can oversee all registered user profiles currently assigned to the hardware.
Removing the Profile From System Storage
Within the Users and Accounts menu, locate and select the Delete User option at the bottom of the list. You will see a list containing every profile currently installed on the console alongside its associated avatar. Highlight the specific profile you wish to remove and confirm your selection to initiate the deletion process.
A warning prompt will appear on the screen informing you that local saved data, screenshots, and video clips linked to that profile will be deleted from the system storage. Confirming the deletion will clear these local files while keeping your online PlayStation Network profile safe in the cloud. After confirming, the console will quickly remove the user profile from the home interface.
Understanding Saved Data and Cloud Backups
Deleting a user profile permanently removes local save files tied specifically to that user on the console. If you subscribe to PlayStation Plus, your saved game data is likely backed up in cloud storage automatically. You can always sign back into the same account in the future to restore game data and re-download purchased digital titles.
However, if the account did not utilize cloud storage, any unsaved local progress will be lost permanently once removed. It is recommended to manually back up important save files to USB or cloud storage before removing an account. Taking this precaution ensures that your valuable game progress remains accessible if you ever reinstall the profile later.
Managing Primary Console Sharing Settings
Before deleting a primary account from a PS5, it is wise to check your Console Sharing and Offline Play settings. Disabling console sharing on an account before removal ensures that your game library is properly unlinked from the device. This extra step prevents licensing issues if you plan to activate a new primary console elsewhere.
You can adjust these options by navigating to Users and Accounts, selecting Other, and choosing Console Sharing and Offline Play. Disabling this setting clears your primary status from the hardware safely. Following these steps ensures your account remains fully secure across all Sony PlayStation services.

Disturbing the Sleep of Kings Nier Replicant: Quest...
The quest titled Disturbing the Sleep of Kings in NieR Replicant is an important endgame side activity that players must complete to collect every weapon in the game. Completing this objective grants players the Labyrinth's Song two-handed sword, which is essential for unlocking Endings C, D, and E. Navigating through the requirements and steps for this mission ensures that players can secure their rewards without running into progression roadblocks.
Prerequisites for Unlocking the Quest
Before players can accept this task, they must progress into the second half of NieR Replicant's story as adult Nier. Additionally, completing the prerequisite side quest known as A Shade Entombed is mandatory before the King of Facade will offer this request. Players must also ensure they have retrieved the Cerberus Fragment as part of the main storyline to make the King appear on his mansion roof in Facade.
Starting the Quest in Facade
To begin the mission, travel to the city of Facade and make your way to the top of the Royal Mansion. Speak directly with the King of Facade, who will express deep concern regarding the desecration of the sacred Barren Temple. He requests your assistance in defeating a massive horde of Shades that have invaded the tomb, threatening the eternal rest of ancient royalty.
Clearing the Shades in the Barren Temple
Head outside Facade and enter the Barren Temple to track down the invading monsters. Make your way toward the long stone bridge that leads directly to the central boss room, where numerous powerful Shades await. Be prepared for a tough battle, as these enemies deal substantial damage and possess large health pools.
Completing the Task and Claiming Rewards
After eliminating all the Shades guarding the bridge and the main chamber, return to Facade to deliver the news to the King. Speak with him atop the mansion balcony to finalize the quest and earn his gratitude. As a reward for your efforts, you will receive the Labyrinth's Song, bringing you one step closer to full weapon collection completion.

Girl Superhero Names and Pictures: Creative Hero Ideas...
Creating compelling female superhero characters involves combining distinct character traits with memorable titles and impactful visual designs. Whether developing a protagonist for a comic series, an indie game, or a creative writing story, building a unique identity helps your hero resonate with audiences. Exploring diverse themes and visual elements allows creators to craft powerful heroines who stand out in modern storytelling.
Designing Memorable Names for Heroines
A successful hero name often reflects the character's core abilities, origins, or overall philosophy. Combining thematic elements like celestial bodies, natural forces, or ancient mythologies can instantly give a character an imposing presence. Choosing names that are easy to pronounce yet distinct ensures the title stays stuck in the audience's mind.
Creators can also experiment with abstract concepts, mixing emotional traits with functional descriptions to establish a unique persona. For instance, pairing words that represent speed, light, or mental fortitude creates an evocative alias for any heroine. Balancing modern naming trends with classic superhero conventions results in a timeless character identity.
Visualizing Characters Through Conceptual Artwork
Visual presentation is just as essential as a strong name when bringing a new female superhero to life. Utilizing concept art and reference pictures helps establish costume aesthetics, color palettes, and signature silhouettes early in the design process. A distinct silhouette ensures the character remains recognizable even in shadow or dynamic action scenes.
Costume design should reflect both the character's functional needs and her personality traits. Incorporating symbolic motifs, practical armor plating, or sleek mobility gear provides visual context for how the hero operates in combat. Reviewing diverse illustration styles offers valuable inspiration when sketching out new heroic concepts.
Connecting Powers to Personal Identity
A character's abilities should seamlessly align with her origin story and personal narrative arc. Powers derived from cosmic energy, technological innovation, or elemental manipulation influence both visual art choices and combat styles. When abilities feel tied to a character's emotional journey, the overall hero design becomes significantly more engaging.
Integrating unique limitations or power source requirements adds depth and prevents characters from feeling overly invincible. This balance encourages creative problem-solving during action sequences, making story conflicts far more suspenseful. A well-defined power system enhances both narrative storytelling and character design.
Building Character Motifs and Color Schemes
Color choices play a crucial role in shaping public perception and establishing a heroine's signature brand. Bright, contrasting colors convey hope and energy, while deeper, muted tones suggest stealth, strategy, or cosmic mystery. Consistent color schemes across costume iterations make the hero instantly identifiable in group shots and promotional media.
Incorporating recurring symbols or emblems on chest plates and gear solidifies the hero's identity across different artistic mediums. These iconic visual cues make it easier for fans to draw fan art and recognize the character instantly. Establishing a strong visual motif is key to long-term character recognition.

Alone In The Dark Boiler Room Puzzle And...
Navigating through the eerie corridors of Derceto Manor in Alone in the Dark presents players with numerous environmental obstacles and cryptic brainteasers. Among these challenges, the boiler room puzzle in Chapter 2 stands out as a major storyline gatekeeper that demands thorough exploration. Successfully solving this quest requires finding missing items across the estate, solving an image tile puzzle, and aligning the talisman to reveal new paths.
Finding the Hidden Broken Plate Fragments
To repair the damaged mechanism, players must first locate two missing broken plate fragments scattered throughout Derceto. The first piece requires obtaining the cellar key from the Drawing Room, turning off the electrical breaker in the cellar, and using a valve handle to shut off escaping steam. This allows safe access to the back section of the boiler room where the first fragment rests.
The second broken plate fragment is locked away in Cassandra's room on the upper floor of the mansion. Players must retrieve the medicine box key to gather medicine bottles, which are then arranged on a tray by matching the rot patterns. The resulting numbers map to astrological signs in Perosi's Journal, unlocking the bureau padlocks to yield the final missing piece.
Solving the Boiler Plate Tile Puzzle
With both fragments in hand, return to the basement and interact with the face of the boiler to initiate the tile puzzle. The objective is to swap and rotate the square pieces until they form a coherent picture of a rural chapel landscape. Paying close attention to fixed border pieces and matching line details makes positioning the remaining tiles significantly easier.
When every tile is placed correctly, a distinct audio cue indicates success and the machine powers back on. Solving this visual riddle restores full pressure to the system, causing the attached gauges to reactivate immediately. This mechanical shift unlocks the final stage of the puzzle required to move forward in your investigation.
Deciphering the Pressure Gauges and Talisman Code
Once the boiler is running, look at the three pressure gauges mounted on the side of the apparatus. Each gauge displays a specific number based on its dial size, representing the hidden combination. Observing the numbers from the largest gauge to the smallest gauge reveals the sequence nine, seven, and five.
Finally, open your talisman interface and input the numbers revealed by the pressure dials. Rotate the largest outer ring to nine, the middle ring to seven, and the smallest inner dial to five. Entering this correct alignment activates the supernatural device, opening a gateway into the cellar and advancing the narrative into the next chapter.
Troubleshooting Common Boiler Puzzle Issues
Some players occasionally report difficulties getting the tile arrangement to register even when the picture appears correct. This issue usually happens when two similar border pieces are swapped into incorrect positions despite looking nearly identical. Re-checking the outer frame edges and swapping adjacent border tiles usually resolves the problem and triggers the completion cutscene.

How Many Sequences Are In Assassins Creed Revelations...
Delving into the final chapter of Ezio Auditore’s legendary trilogy requires an understanding of how the game structures its narrative journey through Constantinople. Unlike its predecessors, which featured sprawling timelines, this installment streamlines its pacing into a tightly packed series of memory blocks. Tracking your campaign progress helps you gauge how close you are to uncovering the secrets of Altaïr Ibn-LaʼAhad and concluding Ezio's personal quest.
The Main Campaign Sequence Structure
The core single-player campaign of Assassin's Creed Revelations consists of exactly nine main memory sequences. Each sequence reflects a major chronological turning point in Ezio’s tactical investigation as he searches for the elusive Masyaf keys. Completing these milestones provides players with crucial narrative context and unlocks advanced tools for city exploration.
As you navigate through the early memory blocks, you will notice a balanced mix of mandatory tutorial missions and heavy cinematic storytelling. The structural flow ensures that players are never overwhelmed by the mechanics before moving into the high-stakes political intrigue of the late game. Most veterans can expect a focused playthrough to take roughly ten to twelve hours to finish completely.
Breaking Down the Key Story Segments
The journey begins with Sequence 1 in the snowy fortress of Masyaf, establishing the immediate stakes of the campaign. Sequences 2 through 7 shift the focus entirely to the bustling streets of Constantinople, where Ezio forms vital alliances with the local Assassin brotherhood. These middle chapters contain the bulk of the open-world activities, recruit leveling systems, and structural tower defense missions.
The narrative reach shifts significantly during Sequence 8 and Sequence 9, bringing the overarching plot to a dramatic and definitive conclusion. These final segments abandon most open-ended exploration elements in favor of highly focused, linear action set-pieces that resolve the Templar threat. Experiencing these late-game memories rewards players with deep emotional payoffs that bridge the gap between multiple generations of the franchise.
Exploring Supplemental Memory Content
Beyond the primary nine chapters, the game expands its structural footprint through several optional memory sequences that enrich the lore. The Desmond Sequences offer a unique first-person puzzle perspective that unlocks as players collect hidden Animus data fragments across the map. These five additional levels provide essential backstory regarding Desmond Miles's life prior to his initial capture by Abstergo.
Additionally, players can experience the Lost Archive downloadable content, which introduces a separate seven-part structural story focusing on Subject 16. These digital expansions bring the total narrative packages well beyond the standard campaign structure. Exploring these supplemental zones ensures a complete understanding of the grand conspiracy binding the modern and historical worlds together.

Resident Evil 2 Remake Map And Complete Location...
Navigating the terrifying corridors of Raccoon City requires more than just quick reflexes and a steady aim. Survival in Resident Evil 2 Remake depends heavily on your spatial awareness and understanding of the shifting sandbox environment. Mastering the layered layout of each major zone ensures you can optimize your routing and avoid deadly dead ends.
Mastering the Raccoon City Police Department
The iconic police station serves as the central hub for the early hours of your harrowing survival journey. This massive building features multiple floors filled with interconnected rooms, hidden safe rooms, and puzzle mechanics. Memorizing the location of key barricades allows players to establish safer pathways through the main hall and side wings.
As you explore the western and eastern corridors, updating your in-game tracking tool becomes an absolute necessity for survival. Recognizing which doors require specific keycard suits will prevent unnecessary backtracking through zombie-infested hallways. Keeping a close eye on the color-coded indicators helps ensure you never wander blindly into dangerous territory.
Exploring the Dark Depths of the Sewers
Once you escape the confines of the police station, the journey transitions into a bleak underground network. The murky layout of the sewers introduces a completely different navigation challenge filled with radioactive threats and heavy infrastructure. Players must carefully balance resource management while searching for the vital electronic plugs required to advance.
This subterranean maze forces survivors to cross deep water channels where massive creatures frequently wait in ambush. Utilizing the upper and lower walkway levels efficiently is the absolute key to bypassing these aggressive underground encounters. Securing the local maps early in this segment will significantly ease the pressure of your tactical planning.
Infiltrating the Advanced Umbrella Laboratory
The final act of the narrative drops players into the sterile, high-tech environment known as the NEST facility. This modern complex relies on strict security clearances and dynamic color-coded wristbands to access hidden scientific wings. Navigating this geometric layout demands absolute precision because the local threats are far more aggressive.
Understanding how the central shaft connects the main laboratory zones allows you to plot the most direct routes possible. Managing your power resources and solving the botanical puzzles efficiently will save valuable time during the explosive climax. Mastering this final corporate layout ensures your survivors can execute a successful escape before the countdown concludes.

How to Evolve Pentagram Vampire Survivors Complete Evolution...
Mastering your weapon progression in Vampire Survivors is the ultimate key to surviving the relentless endgame hordes. While many early-game items provide simple directional damage, the Pentagram offers a high-risk, high-reward mechanic that clears the entire screen at regular intervals. Understanding how to evolve this volatile item transforms it from a frustrating resource-deleter into an unstoppable force for collecting experience points.
Required Items for the Pentagram Evolution
To begin the evolution process, you must first secure the Pentagram weapon and level it up to its maximum capacity of level eight. This item randomly triggers a screen wipe that destroys both enemies and nearby pickups, which can make early leveling somewhat challenging. Fortunately, investing in luck attributes helps reduce the chance of your items being permanently erased by the blast.
Alongside the weapon itself, you need to acquire the Crown passive item from your stage layout or level-up selection. The Crown provides a welcome boost to your character's experience gain, allowing you to quickly recover any lost momentum. Unlike the weapon, the Crown only needs to be at level one to satisfy the fundamental evolution requirements for this combination.
Triggering the Evolution via Treasure Chests
Once you have fulfilled the item level conditions, your next task is to locate a high-quality treasure chest dropped by a powerful boss enemy. In most standard stages, valid chests only begin spawning after the ten-minute mark has passed on the active timer. Defeating these specialized targets ensures that the game engine rolls for a weapon upgrade rather than a standard gold reward.
Opening the correct chest instantly triggers the animation that transforms your setup into the legendary Gorgeous Moon. This upgraded version completely replaces the old asset and alters how the screen-wipe mechanic functions for the remainder of your run. It is highly recommended to plan your movement around these boss spawns to guarantee a smooth transition during intense waves.
The Powerful Benefits of Gorgeous Moon
The transition to Gorgeous Moon completely eliminates the negative aspects associated with the base weapon. Instead of destroying valuable items, the upgraded blast automatically generates extra experience gems from erased monsters. This dramatic shift allows players to accelerate their late-game builds and reach incredibly high levels before the final reaper arrives.
Furthermore, the weapon introduces a magnetic pull mechanic that automatically gathers all remaining gems on the map directly to your position. This ensures that no resources are left wasted in distant corners of the stage while you focus on evasion. The consistent screen clearance combined with massive experience collection makes it a premier choice for dedicated players.

sons of the forest stone id Stone Item...
Surviving the treacherous island in Sons of the Forest requires a constant gathering of raw resources to build fortifications and craft baseline structural defenses. While smaller pebbles are easy to find along the beaches, locating larger stones for heavy construction projects can become a tedious chore during extensive playthroughs. Utilizing the built-in developer console allows players to bypass the traditional gathering grind by instantly summoning the exact materials needed to complete their fortress designs.
Understanding the True Identity of Large Stones
Every unique resource inside the game environment relies on a specific numerical value within the underlying software architecture to distinguish it from other items. For standard large stones required to build robust walls and foundations, the developer system uses the item identification number 440 to process spawn commands. Inputting this specific identifier correctly ensures that the simulation materializes the exact building asset rather than dropping smaller rocks or irrelevant survival gear.
Before you can utilize this resource identifier, you must first initialize the hidden developer command interface during an active gameplay session. To activate the built-in cheat system, simply type cheatstick directly on your keyboard while wandering around the open world environment. Once executed, hitting the tilde key will display the terminal overlay where you can input custom parameters to adjust item quantities or manipulate world configurations instantly.
The Core Commands for Spawning Building Materials
To add the necessary construction materials directly to your active character inventory, you must utilize the standard additem console command followed by the correct resource number. Typing additem 440 into the active terminal screen will instantly grant your character a single large stone to use for your ongoing project. If you wish to fully maximize your current storage capacity without searching the landscape, entering the spawn command multiple times will quickly fill your immediate carrying limits.
For players who prefer to drop materials directly onto the terrain rather than managing inventory slots, the alternative spawnitem command provides an excellent solution for rapid construction. Inputting spawnitem 440 followed by a specific numerical value will drop a neat stack of building resources right in front of your character's current position. This method allows you to quickly gather materials near a construction blueprint without wasting valuable time running back and forth across the camp.
Optimizing Your Base Defense Construction Workflow
Using the console command network drastically shifts how players approach long-term survival strategy and perimeter defense layout designs. Instead of spending hours scouring riverbeds and forest floors, builders can focus their entire energy on designing complex architectural blueprints to keep out hostile cannibal factions. This efficient method is particularly useful when testing creative base layouts in single-player modes before implementing them in standard survival sessions.
While utilizing automated item generation commands provides an incredible advantage, it is highly recommended to maintain regular save backups before executing massive spawn cycles. Overloading a localized grid zone with hundreds of dropped assets can occasionally trigger sudden performance drops or unexpected simulation stability glitches. Balancing automated resource generation with traditional construction practices ensures a smooth, creative gameplay experience as you secure your island sanctuary.

Split Screen Survival Games PS5 Best Local Multiplayer...
The popularity of local multiplayer continues to thrive on modern hardware, offering players a tangible way to connect through shared experiences. While online connectivity dominates the industry, diving into split-screen survival games on the PlayStation 5 delivers a unique level of tension and camaraderie. Navigating harsh environments, managing scarce resources, and fending off dangerous threats becomes much more engaging when your partner is sitting right next to you on the couch.
The Evolution of Shared Screen Survival
Modern game development has pushed the boundaries of what local cooperative play can achieve visually and mechanically. The powerful hardware architecture of the PlayStation 5 ensures that rendering two distinct gameplay perspectives simultaneously does not compromise performance or visual fidelity. This technical capability allows developers to create deeply immersive open worlds where split-screen partners can independently explore, harvest materials, and build structures without experiencing severe frame rate drops.
Survival mechanics naturally complement local cooperative dynamics because they demand constant communication and strategic division of labor. One player can focus on fortifying a base perimeter while the other ventures into hazardous territory to hunt for rare food or crafting components. This interconnected reliance fosters a genuine sense of shared triumph when surviving particularly brutal in-game events or enduring harsh seasonal shifts together.
Top Voxel and Sandbox Adventures on PS5
Among the most enduring split-screen experiences available on the console are titles that emphasize absolute creative freedom alongside rigorous survival loops. Games featuring destructible voxel environments allow players to reshape landscapes entirely to protect themselves against nocturnal threats or environmental hazards. The persistent progression systems in these sandbox titles ensure that local pairs can invest dozens of hours into developing an expansive settlement.
Managing hunger, hydration, and defense variables requires a high degree of tactical coordination when utilizing a shared display. Navigating these complex menus alongside your partner can be challenging, but mastering the shared UI layout is incredibly rewarding. For enthusiasts seeking to explore these mechanics further, exploring dedicated communities like local multiplayer games can provide exceptional recommendations and configuration tips to maximize your couch sessions.
Bracing for Harsh Wilderness Challenges
If you prefer a more realistic approach to environmental hazards, realistic simulator styles offer uncompromising mechanics that test your true endurance. These adventures frequently drop players into desolate wilderness environments or zombie-infested quarantine zones where every minor mistake carries severe consequences. Managing your physical health, treating sudden injuries, and maintaining optimal body temperature requires meticulous planning and resource sharing.
The physical proximity of local multiplayer adds an irreplaceable layer of excitement during high-stakes combat or stealth scenarios. When a sudden blizzard rolls in or an aggressive horde compromises your shelter, the ability to coordinate defenses verbally in real-time is invaluable. This immediate feedback loop often determines the boundary between a successful extraction and losing a massive inventory of hard-earned materials.

Black Desert vs Guild Wars 2 Which MMO...
Choosing a long-term virtual home in the massive multiplayer online role-playing game genre often comes down to comparing two titans with completely opposite design philosophies. Black Desert Online and Guild Wars 2 both command massive global player bases but offer vastly different paths regarding character progression, combat speed, and endgame activities. Understanding how each game respects your time and rewards your effort is essential before committing to the digital grind.
Combat Mechanics and Action vs Strategy
Black Desert Online features a highly complex, fast-paced action combat system that feels closer to a traditional fighting game than a standard online RPG. Players must master intricate button combinations, animation cancels, and precise positioning to maximize their damage output efficiently. The visual design of the combat is flashy and exceptionally responsive, making the moment-to-moment monster hunting highly engaging for action enthusiasts.
On the other hand, Guild Wars 2 utilizes a hybrid combat system that beautifully blends traditional tab-targeting mechanics with active positioning and dodging elements. Your available skill loadout is directly tied to the specific weapons your character equips, encouraging tactical preparation before stepping into battle. The animations remain smooth and readable, allowing for deep coordination during chaotic group encounters and massive open-world events.
Progression Systems Vertical Endless vs Horizontal Freedom
The progression loop in Black Desert Online is distinctly vertical and revolves around a highly demanding gear enhancement system. Players spend hundreds of hours accumulating resources to upgrade their weapons and armor for higher statistics. This endless pursuit of power provides a massive sense of long-term achievement but requires intense dedication and tolerance for randomized upgrade mechanics.
Conversely, Guild Wars 2 introduces a refreshing horizontal progression model that strictly respects your personal time away from the computer. Once you acquire the maximum tier of equipment, that gear remains permanently viable across all future expansions and updates. Instead of chasing higher item statistics, players focus on unlocking unique mastery tracking systems, beautiful cosmetic appearances, and diverse utility options.
Endgame Focus Sandbox Grinding vs Structured Cooperative Play
The endgame experience in Black Desert Online behaves like an open-world sandbox centered around solo monster grinding and competitive player-versus-player conquest. Guilds frequently battle over lucrative territories in massive Node Wars that test organizational leadership and individual mechanical skill. Life skills such as trading, sailing, and cooking also offer deep alternative pathways for pacifist players who prefer economic strategy over active warfare.
Meanwhile, the virtual world of Guild Wars 2 prioritizes cooperative exploration and structured group content like instanced dungeons, raids, and fractals. The game shines brightest during dynamic world events where hundreds of players naturally band together to defeat colossal map bosses without needing a formal party invite. If you want to dive deeper into competitive multiplayer strategies, you can also look into alternative options like to enhance your cooperative gaming journey.
Making the Final Decision for Your Playstyle
Ultimately, your choice depends entirely on what type of reward loop fulfills your gaming preferences. If you crave a gorgeous sandbox world with deep combat mechanics, complex economy systems, and an endless vertical grind, Black Desert Online is your perfect match. However, if you prefer a stress-free environment focused on cooperative storytelling, exploration freedom, and permanent progression milestones, Guild Wars 2 will be the better long-term investment.

7 Days To Die Mechanical Parts Without Wrench...
Surviving the early game of 7 Days to Die requires players to manage multiple crafting bottlenecks, with mechanical parts often posing the toughest challenge. While most veterans rely heavily on a salvage wrench to gather these components, new survivors frequently find themselves stuck without this essential tool during their first week. Knowing how to efficiently acquire these items through alternative exploration methods ensures your base progression and vehicle assembly remain perfectly on schedule.
Scavenging Loose Trash and Environmental Waste
One of the most reliable alternative ways to secure mechanical parts during your initial survival run is to thoroughly inspect localized trash containers. Sacks, garbage piles, and standard waste bins scattered across the roads have significantly upgraded drop rates for complex components. Spending your early daylight hours tracking these small piles can yield a steady supply of metal components without requiring heavy physical tools.
Additionally, abandoned cardboard boxes located inside ruined residential structures often contain left-behind building supplies. Checking every container, even those that seem empty, maximizes your early-game utility. This deliberate methodology allows you to gradually bypass the initial harvesting bottleneck while accumulating valuable crafting formulas.
Looting Working Stiff Trucks and Crates
Commercial vehicles and construction sites serve as excellent alternative resource hubs for survivors seeking high-tier hardware. Specifically, searching through the back of broken-down utility vans and Working Stiff trucks can provide immediate stacks of un-craftable materials. These specific containers often hold leftover mechanical items that were meant for industrial tasks before the apocalypse began.
If you encounter a localized hardware store, focus your immediate attention on the sealed shipping crates located in the storage rooms. These heavy containers are meant to hold mid-game loot, meaning mechanical pieces frequently appear alongside basic construction equipment. Breaking down the surrounding wooden obstacles allows safe, quiet access to these highly lucrative stockpiles.
Utilizing the Trading Networks for Essential Gear
When localized scavenging runs prove unsuccessful, interacting with automated merchants offers a practical insurance policy for desperate builders. Nearby trader settlements stock a rotating inventory of industrial components that can be purchased directly using your accumulated casino tokens. This transactional approach provides a guaranteed fallback plan when the surrounding wilderness feels completely depleted of useful mechanical loot.
Completing low-tier clearing contracts for these merchants also rewards you with additional resource bundles upon completion. These reward choices frequently include bundles of structural elements or even the raw materials needed to finally fashion your first proper crafting table. Combining active contract fulfillment with regular inventory checks keeps your crafting capabilities growing at a steady pace.
Scrapping Common Household Appliances Directly
Many survivors overlook the inherent value of common appliances found within residential kitchens and office buildings. While complex disassembly normally yields the highest returns, players can still secure minor materials by choosing to scrap specific items directly from their inventory menu. Breaking down salvaged car engines or damaged electronic pieces often yields small portions of mechanical hardware as a secondary byproduct.
Office environments are particularly useful because they hold rows of filing cabinets and broken metal chairs that can be searched quickly. Finding hidden desk components can supply the exact amount of hardware required to start building advanced defensive traps. Prioritizing these safe interior locations during rainy weather or dangerous nights keeps your character productive without risking exposure to wandering zombie hordes.

Darkest Dungeon Stack of Books Trinket and Curio...
Navigating the grim hallways of Darkest Dungeon requires more than just high damage output and proper stress management. Players must frequently decide whether to engage with various environmental interactive objects known as curios, which can either bless an expedition or completely ruin a hero's mental state. Among these, the Stack of Books is one of the most enigmatic fixtures encountered in the Ruins and the Warrens, posing a massive gamble for unsuspecting adventurers.
The Risks of Blind Interaction
Interacting with a Stack of Books without any preparation yields a highly unpredictable outcome that heavily favors negative consequences. There is a substantial chance that reading these forgotten texts will afflict your hero with an immediate stress spike or a debilitating negative quirk. Because the baseline reward is often just a random piece of lore, blindly touching this object is generally considered a poor tactical decision.
Furthermore, heroes with compulsive quirks might automatically interact with these texts against your wishes, throwing a wrench into your carefully planned resource allocation. Managing these problematic behaviors back at the Hamlet is essential to prevent your roster from self-sabotaging during deep dungeon crawls. Experienced players often bypass this curio entirely if their squad is already hovering near high stress levels.
Cleansing Items and Expected Outcomes
Unlike many other objects in Darkest Dungeon, the Stack of Books does not possess a straightforward cleansing item that guarantees high-tier loot or clean buffs. Using a torch on the pile will instantly trigger an intense explosion of flames, causing the interacting hero to absorb a significant amount of stress. While it removes the curio from the map, this extreme option provides no tangible benefits and should be avoided entirely.
Instead, the absolute best outcome occurs when a clean interaction randomly provides a powerful positive quirk or grants a rare journal page that sheds light on the game's dark lore. The underlying math dictates that the object carries a sixty-six percent chance of giving a quirk, but a third of those results will be negative rather than positive. Knowing these specific internal mechanics allows players to evaluate the risks based on their current survival needs.
Trinket Synergies and Roster Management
While this particular curio does not directly drop specific trinkets, the consequences of reading the books can drastically alter how you choose to equip your party. If a character accidentally inherits a stress-inducing quirk from the pages, you will need to counter the defect using specialized defensive items. Equipping artifacts that reduce stress accumulation becomes vital for keeping affected heroes functional throughout the remainder of the quest.
Ultimately, a successful run depends on knowing when to take measured risks and when to walk away from tempting interactables. The Stack of Books serves as a perfect reminder that knowledge in this hostile universe is often a curse rather than a blessing. Balancing the urge to uncover hidden secrets against the physical limitations of your squad is the true test of any master tactician.

Stop Steam From Opening on Startup Simple Ways...
Waiting for your gaming platform to load every time you turn on your computer can become an annoying addition to your daily routine. When Steam automatically launches during the boot process, it consumes valuable system memory and slows down your desktop's initial responsiveness. Managing these background preferences allows you to regain control over your operating system's performance metrics right from the start.
Adjusting Preferences Directly Inside the Steam Client
The most straightforward method to change this behavior is located right within the gaming application interface itself. Users can open the main client window and navigate directly to the top-left menu settings section. From there, selecting the interface tab reveals a toggle switch specifically designed to control system boot behaviors.
Turning off the automatic execution option ensures the software remains completely silent until you choose to open it manually. This built-in feature provides a safe and highly effective way to customize system parameters without altering external files. Taking a few seconds to adjust these parameters prevents unexpected update pop-ups from interrupting your morning workflow.
Utilizing the Windows Task Manager Options
When software-level adjustments do not completely solve the problem, the built-in operating system tools offer an excellent secondary solution. Pressing the standard shortcut keys allows you to quickly launch the native Task Manager panel on any modern PC. Navigating directly to the dedicated startup applications section gives you a complete overview of every background program.
Locating the specific gaming service within this list allows you to change its status from enabled to permanently disabled. This administrative command prevents the platform from executing its initialization scripts before you reach your desktop. Using this method is highly recommended for optimizing overall hardware efficiency during the initial boot phase.
Managing System Preferences on macOS Devices
Apple users experiencing similar boot delays can easily modify their background processes through the standard ecosystem options. Opening the system settings panel allows you to locate the specific user accounts and login items configuration area. This directory explicitly lists every background service authorized to activate during a fresh boot sequence.
Selecting the gaming platform from the menu and clicking the subtraction symbol removes its automatic launch privileges entirely. This adjustment ensures that your MacBook or iMac resources remain focused strictly on essential productivity tasks. Keeping this directory clean significantly reduces operational lag when waking your device from a complete shutdown status.
Exploring Advanced Launch Parameter Enhancements
For enthusiasts seeking absolute precision, configuring advanced desktop shortcuts offers an additional layer of command line customizability. Adding specific command arguments to the destination path modifies how the underlying engine interacts with your hardware upon execution. These parameters can force the application to start completely minimized to the system tray rather than opening a massive storefront window.
Implementing these simple modifications creates a seamless equilibrium between immediate software accessibility and raw operating system speed. Understanding how to manage these digital environments helps you maintain a highly responsive computer layout tailored to your lifestyle. Taking proactive steps to regulate resource distribution ensures a vastly superior computing experience over the long term.

Reap What You Solo Box Code
The gaming community is experiencing a massive wave of excitement as developers introduce innovative reward systems to enhance solitary player progression. Navigating independent challenges requires a massive balance of resource planning and tactical patience to optimize character progression loops. Utilizing specialized unlock codes has become a primary method for dedicated players looking to secure premium loot and rare cosmetic upgrades without relying on a full multiplayer party.
The Mechanics of the Solo Box System
The implementation of the solo box mechanic fundamentally changes how individual gamers approach high-stakes combat encounters. This unique reward structure functions similarly to a classic digital safe, dropping high-tier equipment and resources strictly based on solitary survival milestones. Players must complete complex regional objectives entirely on their own to earn the right to unlock these premium resource containers.
By removing the cooperative requirement, the gameplay loops reward true personal mastery and mechanical knowledge of the environment. Each successfully opened container delivers curated rewards designed to strengthen individual builds for subsequent endgame encounters. This focused progression path ensures that solitary enthusiasts never feel left behind by traditional multiplayer reward structures.
How to Redeem the Reward Code Effectively
Claiming your exclusive promotional items requires following a direct sequence within the main game navigation interface. Players need to locate the dedicated redemption tab inside the settings menu before inputting the specific alphanumeric string. Making sure your platform account is fully synced beforehand guarantees that the rewards appear instantly in your global storage stash.
It is important to remember that these operational keys often feature strict expiration dates managed by the live-service development team. Active community members recommend redeeming any active sequences immediately during seasonal update windows to avoid missing out on limited event items. Keeping a close eye on developer communication channels is the best strategy for tracking new distributions.
Optimizing Independent Character Progression
Securing rare items from targeted reward drops completely transforms your tactical approach to high-level content. The extra crafting materials and specialized currencies provided by the box allow you to upgrade your armor sets much faster than standard foraging paths. This structural advantage gives you the defensive capabilities needed to survive hazardous regional bosses comfortably.
Balancing your everyday progression tasks with these dedicated reward systems creates a highly efficient gameplay loop for casual and hardcore players alike. Maximizing your output involves mapping out your daily routes to hit specific challenge criteria while simultaneously working toward larger milestone targets. Consistent dedication to these individual loops ensures steady advancement through the complex narrative tiers.
Future Updates and Community Expectations
Live-service developers continue to explore fresh ways to keep solitary gameplay modes engaging and mechanically rewarding over long seasonal cycles. Future patches are expected to introduce expanded drop tables and more diverse challenge tiers tailored specifically for independent wanderers. This ongoing support ensures that the internal ecosystem stays vibrant and highly satisfying for the entire player base.
As game systems evolve, the synergy between seasonal promotional events and in-game achievements will likely become even more deeply integrated. Enthusiasts across global forums remain highly optimistic about the creative direction of these independent progression mechanics. Refining the balance between difficulty and reward will guarantee that individual triumphs feel genuinely earned and widely celebrated.

Best Legendary Perks In Fallout 76 For Powerful...
Optimizing your endgame character character configuration in Fallout 76 requires a deep understanding of how advanced passive abilities synergize with your equipment. Reaching level 50 unlocks the powerful Legendary Perk system, which allows survivors to push past traditional attribute limitations and build exceptionally specialized characters. Selecting the right combination of these high-tier cards will dramatically boost your damage output and overall survivability across the Appalachian wasteland.
Maximizing Attributes with Legendary SPECIAL Cards
The most universally valuable choices for any endgame build are the Legendary SPECIAL perks, which grant passive attribute points alongside additional standard perk slots. By investing in cards like Legendary Strength, Agility, or Intelligence, you can easily slot more defensive or offensive mechanics into your active loadout. This structural freedom allows you to build incredibly versatile hybrid archetypes without sacrificing core utility or convenience features.
Many veteran players prioritize these passive attribute boosts because they offer permanent upgrades that benefit every playstyle. Unlike situational combat cards, having more total points directly translates to better baseline stats and deeper build customization options. It is widely considered the safest investment for optimizing your progression across multiple character variants.
Enhancing Defensive Layering with Funky Duds
Surviving high-end public events and daily ops requires a solid defensive strategy against specialized environmental threats. The Funky Duds perk provides a massive boost to your poison resistance, provided you are wearing a complete matching set of armor. This mechanical layer prevents unexpected damage spikes from toxic hazards, Mirelurk Queens, and specific mutation modifiers that can quickly eliminate unprepared explorers.
While standard physical defenses protect you from ballistic impacts, elemental hazards often bypass traditional armor values entirely. Equipping this card even at rank one or two grants enough passive mitigation to completely trivialize some of the most frustrating encounters in the game. It allows high-damage bloodied configurations to maintain low health pools safely without fearing instant death from environmental status effects.
Boosting Team Dynamics with Taking One for the Team
For players who frequently explore the wasteland in public groups, utilizing cooperative offensive buffs can dramatically speed up endgame boss encounters. The Taking One for the Team card causes enemies to receive significantly increased damage from all sources after they attack you while you are on a team. This debuff multiplies your entire group's collective damage output, making it an absolute necessity for dedicated frontline tanks and heavy weapon users.
This unique mechanic scales exceptionally well during massive server events like Scorched Earth or A Colossal Problem. Because the damage bonus applies directly to the target, it enhances the performance of every single teammate actively shooting the boss. It serves as an incredible force multiplier that rewards strategic positioning and aggressive playstyles in cooperative scenarios.
Streamlining Resource Management with Electric Absorption
Power armor enthusiasts can completely redefine their resource loop by incorporating high-tech defensive utility into their active builds. The Electric Absorption perk gives you a distinct chance to absorb incoming energy attacks to instantly recharge your equipped fusion core. Additionally, this high-tier mechanic triggers a powerful healing effect that restores your active health pool when struck by laser or plasma fire.
This incredible utility completely eliminates the need to constantly farm or craft replacement power sources during extended play sessions. Navigating into dense automation facilities or fighting energy-wielding factions transforms dangerous encounters into free resource replenishment zones. It provides unmatched sustain that allows heavy builds to remain permanently aggressive in the field.

How to Get Bone in Palworld Fast
Gathering essential crafting materials in Palworld is crucial for expanding your base and producing advanced gear. Bones serve as an indispensable resource for crafting items like cement, medicine, and high-tier equipment during early and mid-game progression. Knowing the fastest methods to obtain bones allows players to streamline their manufacturing pipelines and upgrade their equipment without unnecessary delay.
Hunting Specific Pals for Rapid Drops
Defeating or capturing certain species of Pals is one of the most direct ways to stock up on bones. Creatures such as Vixy, Rushoar, Cawgnito, and Loupmoon frequently drop bones upon defeat in the wild. Concentrating your hunting efforts around starting areas where Rushoar and Vixy spawn ensures a steady supply without facing severe danger.
Equipping a fast mount and using ranged weaponry significantly speeds up your hunting efficiency across the map. Engaging groups of low-level Pals lets you collect dozens of materials in a short period. This active hunting approach provides immediate results when you need materials right away for crafting projects.
Purchasing Bones from Wandering Merchants
Buying materials directly from merchants is arguably the quickest solution if you have accumulated enough Gold Coins. Red-clothed Wandering Merchants found in settlement locations like Small Settlement sell bones for a reasonable price. This strategy completely eliminates the time spent searching for wild targets across distant biomes.
To maximize this purchasing strategy, players can farm gold by selling excess items or valuable materials crafted at base. Transporting a Wandering Merchant back to your main base using a Pal Sphere allows for instant access to their inventory whenever supplies run low. Utilizing gold reserves makes securing bulk quantities of bones effortless.
Optimizing Base Automation and Butchering
Assigning captured Pals to specific base structures offers a passive stream of incoming items over time. While farming directly from ranching yields various passive goods, active capturing followed by utilizing a Meat Cleaver doubles your material yields per creature. Capturing targeted entities gives you item drops during the initial catch and additional resources upon processing.
Combining active hunting routes with smart base management creates a balanced strategy for long-term crafting demands. Keeping a healthy stock of bones ensures that cement production never stalls during major base upgrades. Mastering these efficient methods helps survivalists maintain a distinct advantage throughout their journey in Palworld.

How Large Is the Subnautica Map
Diving into the alien depths of Planet 4546B presents an immersive open-world experience that captivates survival enthusiasts worldwide. Understanding the physical layout and total area of this aquatic environment is essential for effective exploration and resource gathering. Knowing exactly how far the ocean extends can help you plan your long-distance journeys across the virtual sea.
The Total Surface Area of the Underwater Crater
The playable area of the map spans roughly two by two kilometers on the surface, totaling about four square kilometers of explorable territory. This zone is geographically structured as a massive volcanic crater isolated in the middle of a vast oceanic void. Because the boundaries are tightly contained, players can cross the entire horizontal expanse relatively quickly using high-tier vehicles like the Seamoth or Cyclops.
While four square kilometers might sound small compared to massive modern sandboxes, the landscape feels significantly larger due to the absence of traditional landmasses. Navigating without landmarks requires players to rely heavily on beacons and compass headings to keep from getting lost in the open water. The dense concentration of unique biomes ensures that almost every square meter serves a specific gameplay purpose.
Horizontal Dimensions Versus Vertical Depth
The true scale of the game is defined by its impressive vertical architecture rather than its surface width. The ocean floor drops dynamically from the shallow coral reefs down into terrifying subterranean cave systems. Excluding the bottomless dead zone that borders the outer edges, the absolute deepest playable point reaches down to approximately 1700 meters.
This extreme verticality completely alters how you perceive the space around you. Managing your oxygen supplies, hull pressure limits, and vehicle depth modules becomes a critical part of traversing the deeper layers. Exploring the subterranean biomes effectively doubles the actual volume of the environment, offering hidden chambers beneath the apparent seabed.
Navigating the Dreaded Ecological Dead Zone
Stepping beyond the main volcanic crater triggers a sudden environmental shift into a massive, featureless drop-off known as the Void. This region serves as the psychological boundary of the game world, plunging into near-infinite darkness. The developers designed this endless expanse to deter players from wandering too far away from the carefully constructed game assets.
Entering this zone introduces extreme survival hazards, most notably the aggressive adult Ghost Leviathans that spawn to protect the map borders. There are no resources, scannable items, or story elements hidden within these outer waters. It functions primarily as a dramatic mechanical barrier, emphasizing the feeling of isolation on an alien world.
Why the Scale Feels Perfect for Survival
The compact design allows the developers to populate the entire environment with deliberate, handcrafted details instead of relying on blank procedural generation. Every trench, cave entrance, and alien structure is placed with intent to guide your progression naturally. This dense layout keeps the pacing tight, as you are rarely far from your next major discovery or vital crafting component.
Ultimately, the world balances spatial confinement with intense atmospheric depth. The restricted horizontal size ensures that returning to your main base never becomes a tedious chore. Meanwhile, the dark, multi-layered cavern systems provide plenty of genuine mystery for players seeking a true diving challenge.

How Many Acts Are There In Baldurs Gate...
Navigating the expansive world of Faerûn in Larian Studios' massive role-playing game can be a daunting experience for new players. Understanding the foundational structure of the story helps adventurers pace their journey and manage their exploration goals effectively. This guide provides a detailed breakdown of the narrative chapters to help you plan your gameplay hours efficiently.
The Core Narrative Structure of the Journey
The overarching story is divided into three distinct acts, each offering a completely unique environment and atmospheric shift. Players transition from the wild wilderness into shadows before finally arriving at the legendary city itself. This traditional three-act structure allows the developers to tell a focused yet deeply branching story.
While the count remains simple, the sheer volume of content within each segment varies drastically based on player choices. Some adventurers might spend dozens of hours exploring hidden subterranean areas before moving the main plot forward. Knowing how these chapters are organized ensures you do not accidentally lock yourself out of vital companion side stories.
Act One and the Initial Exploration Wilderness
Your journey begins immediately after surviving a dramatic escape from a flying mind flayer vessel onto a sunny beach. This opening segment acts as a massive sandbox filled with competing factions, ancient ruins, and dangerous subterranean passages. Players must navigate the tensions between local druids, tiefling refugees, and a looming goblin threat.
The first chapter is widely considered the most open-ended portion of the entire game world. It includes both the surface wilderness and the vast depths of the Underdark, along with the treacherous Mountain Pass route. Adventurers typically spend around thirty to forty hours fully uncovering the secrets hidden within this introductory region.
Act Two and the Perils of the Shadow-Cursed Lands
After finding a way through the mountains or the deep tunnels, the narrative shifts into a much darker atmosphere. The second chapter centers entirely on the eerie Shadow-Cursed Lands and the imposing fortress known as Moonrise Towers. Here, survival requires maintaining light sources to fend off a supernatural darkness that drains your party's vitality.
This segment transitions the game from open exploration into a tighter, more narrative-driven tactical experience. The choices made during this grim chapter heavily dictate which allies will survive to assist you in the final conflicts. The climax of this region features some of the most memorable boss encounters and major lore revelations in recent gaming history.
Act Three and the Grand City of Baldurs Gate
The final act brings players to the titular metropolis and its bustling outer suburbs filled with citizens, refugees, and political intrigue. This massive urban landscape reopens the gameplay structure, offering hundreds of individual quest lines scattered across dense streets. Players must navigate the final moves of the primary antagonists while concluding their companions' personal journeys.
Managing your time in the city requires patience due to the overwhelming density of buildings, sewers, and hidden basements. Many players spend upwards of fifty hours in this final region alone just to see how their previous choices impact the world. Successfully completing these challenges leads directly to the grand conclusion of your long adventure.

One Piece World Seeker Review And Gameplay Breakdown
One Piece World Seeker introduces an ambitious open-world format to the iconic anime franchise, sending Monkey D. Luffy on a sprawling journey across Jail Island. Developed by Ganbarion and published by Bandai Namco Entertainment, this action-adventure title shifts away from traditional linear structures to offer players a sense of geographical freedom. Navigating the game requires a balanced understanding of its distinct exploration mechanics, combat flow, and narrative direction.
Exploring the Vast Landscapes of Jail Island
Jail Island serves as a rich canvas for exploration, featuring diverse environments that range from bustling urban centers like Steel City to vibrant rural villages. Luffy utilizes his rubber-like Gum-Gum abilities to slingshot across rooftops, swing from trees, and traverse massive structural heights. This fluid traversal system allows players to interact with the environment in a highly dynamic manner while tracking down hidden chests and materials.
The open landscape is dotted with various Marine bases and heavily guarded checkpoints that challenge your pathing choices. Players can also explore unique sky islands floating high above the main topography, adding verticality to the overall game world. Navigating these elevated zones demands strategic planning to avoid falling back down to the lower regions of the map.
Understanding the Dual Combat Systems
Combat in this title centers on shifting between two primary battle stances known as Haki modes to handle different tactical situations. Armament Haki focuses on raw physical power, slow heavy strikes, and enhanced defensive capabilities to overwhelm sturdy opponents. Conversely, Observation Haki grants Luffy exceptional agility, faster movement speeds, and the precision needed to land quick critical counters.
As you encounter diverse enemy groups, mastering the transition between these modes becomes essential for survival. Long-range options like the Gum-Gum Hawk Eye allow players to target specific snipers from afar before engaging in close-quarters brawls. Accumulating skill points through successful skirmishes unlocks advanced techniques that expand your offensive repertoire throughout the campaign.
Narrative Depth and Faction Dynamics
The storyline offers a completely original tale crafted with supervision from series creator Eiichiro Oda, ensuring the dialogue stays true to the source material. The plot delves into a deep conflict between the Anti-Marine and Pro-Marine factions inhabiting the island under the iron rule of Warden Isaac. This political tension provides a grounded backdrop for the Straw Hat crew as they attempt to uncover the island's hidden corporate secrets.
Fulfilling side quests for the local citizens increases your Pirate Karma, which alters character relationships and unlocks special cutscenes. This system rewards completionists by revealing hidden layers of lore regarding the secondary cast and faction leaders. The inclusion of classic rival characters like Trafalgar Law and Sabo enhances the narrative stakes during the final acts.
Final Verdict on the Straw Hat Adventure
One Piece World Seeker successfully captures the vibrant spirit and adventurous tone of the legendary anime series while experimenting with new structural ideas. While the open environments occasionally suffer from pacing issues during long travel sequences, the mechanics keep fans highly engaged. It stands as a praiseworthy adaptation that offers a genuine sense of freedom for virtual pirates looking to stretch their horizons.

The Plight Of The House Elf Hogwarts Legacy...
Navigating the rich open-world environment of Hogwarts Legacy brings players face-to-face with numerous emotional storylines that expand the lore of the wizarding world. Among the most memorable side objectives is a deeply touching mission that highlights the difficult lives of magical servants. This guide offers a comprehensive walkthrough to help you successfully navigate the challenges hidden within this narrative quest.
Starting the Quest and Meeting Deek
To begin this emotional journey, you must first progress far enough in the main story to unlock the Room of Requirement. Once the room is accessible, you need to speak with Deek, the resident house-elf who cleans the area. He will express profound worry for his long-lost friend, Tobbs, who serves a cruel master in a nearby cave system.
Before setting out, ensuring your character is around level 16 will make the impending combat encounters much more manageable. Deek will mark the specific location of the cavern on your map, directing you toward the southern region of the world map. Preparing your offensive spells and stocking up on healing potions is highly recommended before entering the dark environment.
Navigating Spinners Cavern
Upon arriving at Spinners Cavern, you will immediately notice the dark and web-filled atmosphere dominating the underground paths. The cave system is heavily infested with various types of aggressive arachnids that will attack on sight. Utilizing fire-based magic like Incendio or Confringo is essential for burning away heavy web barriers and exploiting enemy weaknesses.
As you progress deeper into the twisting tunnels, you will need to climb ledges and slide down slippery slopes to find the correct path. Keep a close eye out for scattered notes that detail the tragic daily struggles experienced by Tobbs. These written documents provide critical context regarding his final days under his master's harsh instructions.
Confronting the Spider Menace
The deepest chambers of the cave house the most dangerous threats, including a powerful elite spider boss that blocks your progress. Dodging its unblockable burrowing attacks and using ancient magic throws will help lower its health bar quickly. Defeating this formidable creature allows you to safely explore the final corner of the subterranean hideout.
After the intense battle, you will eventually discover the heartbreaking fate that befell Deek's companion at the end of the tunnel. Players will find a final note alongside a small interaction prompt that confirms the tragic conclusion of the elf's journey. Take a moment to gather any remaining crafting ingredients and gear chests before utilizing the quick-exit pathway nearby.
Returning to the Room of Requirement
Once you have escaped the dark cave system, fast-travel back to Hogwarts Castle to deliver the somber news. Locate Deek inside your customized sanctuary and initiate a conversation to explain what happened to his friend. The emotional dialogue options allow your character to offer comfort during this incredibly difficult realization.
Completing this narrative objective rewards you with valuable experience points to boost your overall character level. Furthermore, finishing this specific task serves as a vital prerequisite for unlocking advanced beast-taming features and expanding your vivarium layouts later. Experiencing this dark storyline provides players with a deeper understanding of the complex social dynamics present throughout the historical magical universe.

Tales Of Symphonia Wind Puzzle Solution And Complete...
Navigating the various dungeons in Tales of Symphonia often requires a mix of strategic combat preparation and clever environmental puzzle solving. One of the earliest roadblocks many players encounter is the intricate trial inside the Balacruf Mausoleum, commonly referred to as the wind puzzle. Successfully manipulating the air currents within this ancient structure is vital for changing your party's destiny and advancing the main questline smoothly.
Reaching the Balacruf Mausoleum
Before you can begin deciphering the elemental mechanics, you must first locate the dungeon nestled within the northern mountains. Ensure your characters are adequately leveled and equipped with updated gear from nearby settlements before stepping inside. The monsters roaming these dusty corridors utilize wind-based attacks that can quickly overwhelm an unprepared party.
Upon crossing the threshold, your first priority is to light the scattered torches to open the initial pathways. Take a moment to familiarize yourself with the regional landmarks and shifting camera angles to avoid getting turned around in the labyrinth. Clearing out the introductory enemy encounters ensures you have total freedom to focus on the mechanical puzzles ahead.
Understanding the Wind Seals and Pinwheels
The central room of the structure houses a massive stone monument flanked by several multi-colored pinwheel devices. To solve this puzzle, players must interact with the Sorcerer's Ring to change its function to output bursts of pressurized air. Directing these sudden gusts of wind toward the correct mechanisms will trigger structural shifts throughout the entire cavern.
Each pinwheel responds differently depending on the direction of your approach and the specific angle of the wind pressure. You can check the surrounding stone walls to find subtle symbols that hint at the proper sequence required for unlocking the seals. If you ever make a mistake during the configuration process, leaving the immediate zone will fully reset the environmental layout.
Step by Step Mechanism Rotation Guide
To successfully complete the primary trial, you must rotate the large stone plates in a highly specific alignment based on traditional directions. Begin by adjusting the northern wheel until it points directly toward the central pedestal, which activates the hidden platform gears. Next, move to the eastern and western components to coordinate the remaining air currents simultaneously.
Aligning the mechanisms in the correct pattern will trigger a brief cutscene showing the main chamber door unlocking completely. If you are looking to take a break after this challenging section, you can check out the Sylvarant Base Walkthrough for tips on surviving the next major narrative dungeon. Ensuring your team is fully healed before stepping through the newly opened pathway is highly recommended.
Defeating the Wind Master Boss Fight
Unlocking the final chamber brings your party face-to-face with the formidable guardian of the seal, known as the Wind Master. This powerful adversary moves across the battlefield with extreme agility and frequently unleashes devastating area-of-effect spells. Keeping your primary healer positioned far away from the boss is essential for maintaining team health throughout the fight.
Utilize characters with high physical defense to draw the guardian's attention while your magical attackers exploit elemental vulnerabilities from a safe distance. Once the creature's health bar drops completely, the trial concludes, rewarding your party with valuable experience points and crucial story items. Collecting the hidden treasure chests in the corner of the room before exiting will maximize your total rewards.
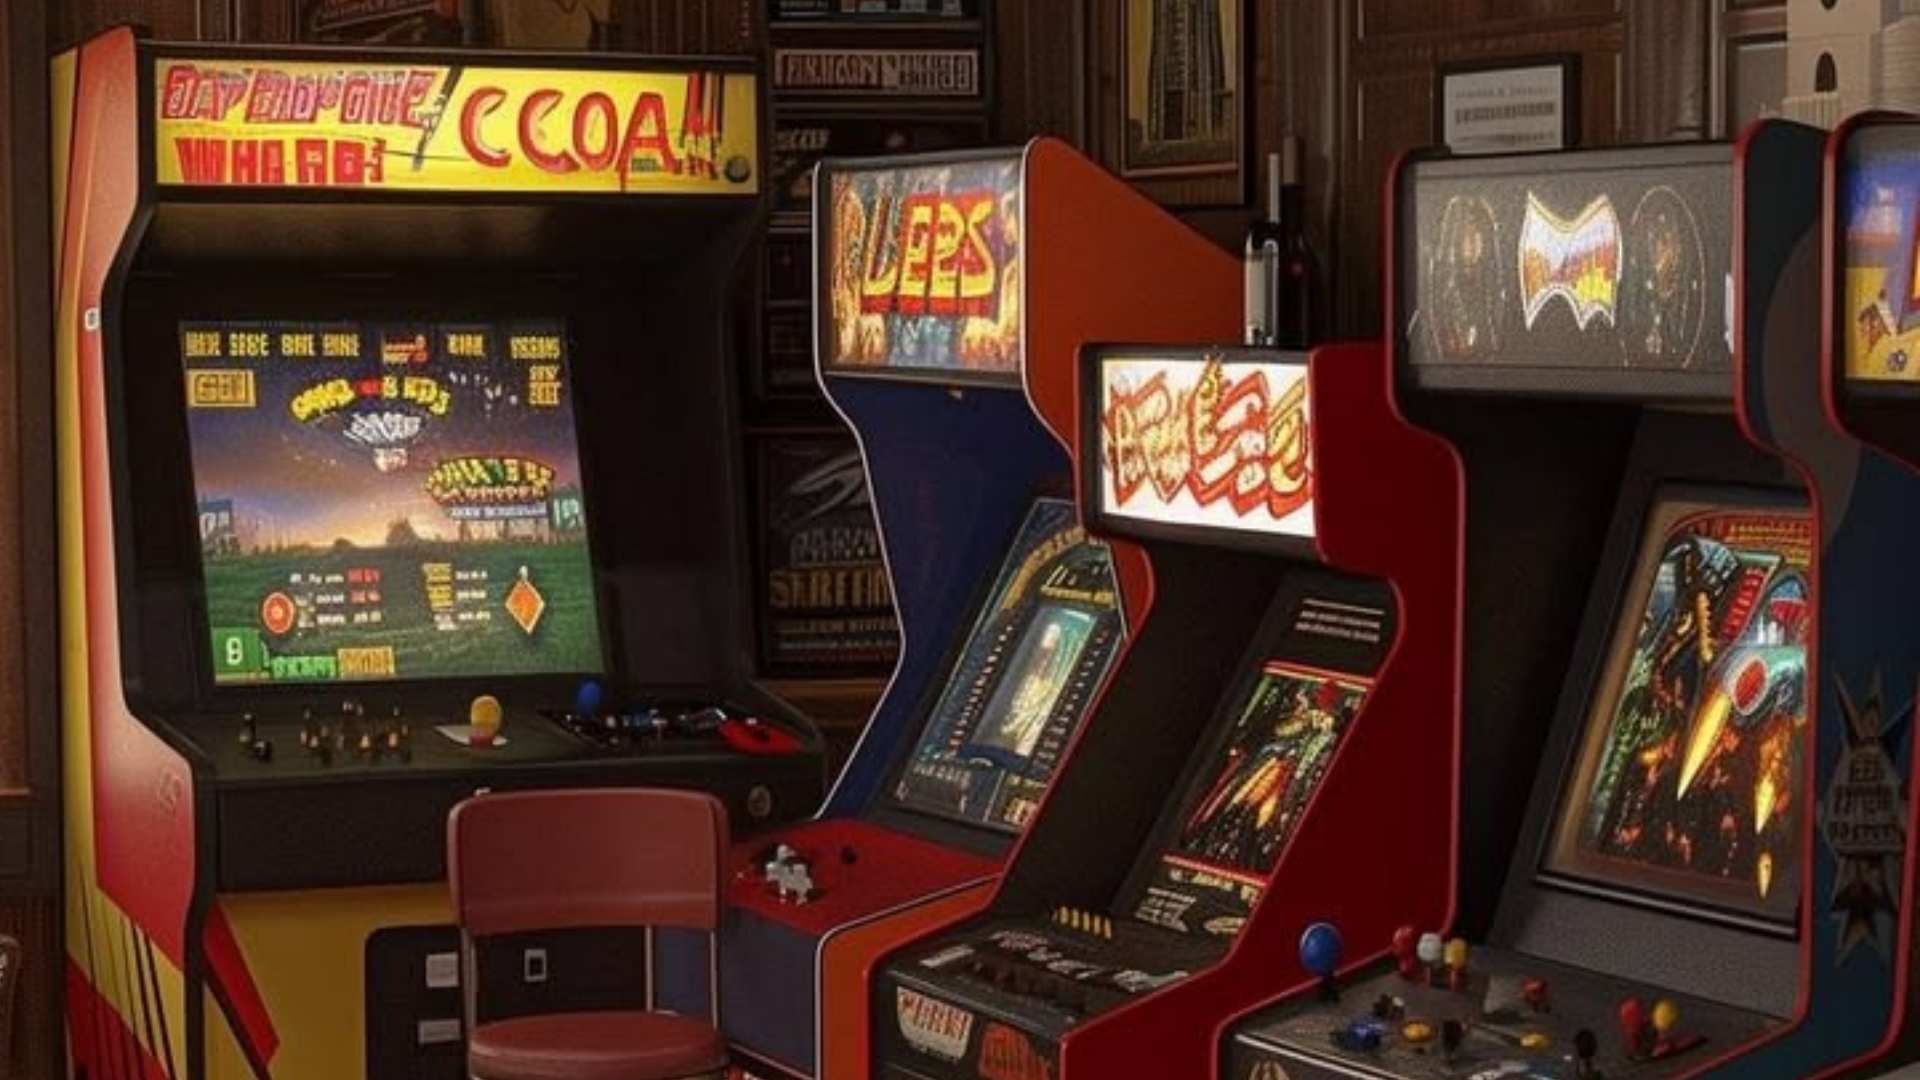
KH3 Starting Choices Critical Mode Complete Beginner Guide
Kingdom Hearts 3 introduces Critical Mode as the ultimate test of patience and tactical awareness for dedicated players. Stepping into this high-stakes difficulty setting reduces your maximum health and magic significantly while amplifying enemy damage parameters. Navigating the opening sequence successfully requires a deep understanding of how your initial statistical decisions impact Sora progression throughout the early game worlds.
Understanding the Desire Attributes
The initial station of awakening presents players with a fundamental choice regarding their preferred combat archetype. Selecting Wisdom provides an early focus on magical capability and enhances your MP recovery speeds. Choosing Vitality grants a slight cushion to your starting health pool, which can prevent unexpected defeats against early boss encounters.
For players embarking on a punishing Critical Mode run, selecting Balance offers a highly versatile compromise between raw magical capacity and physical resilience. This specific decision ensures that your character does not suffer from extreme resource deficiencies during prolonged engagements. Striking a stable middle ground early on helps players adapt swiftly to unpredictable enemy offensive patterns.
Evaluating the Power Choices
The secondary set of decisions directly alters the ordering of your combat abilities and passive survival mechanisms. Opting for the Guardian path grants critical defensive tools like Second Chance and Withstand Combo much earlier in the narrative progression. These specific abilities are absolutely essential for surviving late-game challenges where opponents can deplete your entire health bar instantly.
Choosing the Mystic pathway prioritizes early elemental damage enhancements and combo finishers designed for magic users. Meanwhile, selecting Warrior boosts your physical offensive parameters but delays your access to fundamental defensive safety nets. Beginners are strongly encouraged to favor the defensive setups to maintain stability across the unforgiving early combat trials.
Surviving the Early Olympus Encounters
Once your initial choices are established, the opening world of Olympus serves as a rigorous testing ground for your selected attributes. Basic enemy encounters can easily defeat an unprepared player in just a couple of standard strikes. Utilizing your complete arsenal, including flowmotion movement and precise block timing, is the primary key to achieving early success.
Managing your item inventory perfectly before major encounters drastically increases your overall survival odds. Stocking up on standard potions ensures that you can recover from massive damage spikes when magic resource points are depleted. Maintaining an observant, defensive mindset during these opening sequences allows players to learn enemy tells without forcing unnecessary restarts.
Maximizing Attraction and Formchange Mechanics
Critical Mode demands that players actively exploit secondary combat systems rather than relying purely on basic keyblade swings. Activating specialized Formchanges grants powerful area-of-effect capabilities and completely unique defensive animations that provide temporary invulnerability. Learning the specific activation windows for these transformations helps clear large groups of aggressive heartless efficiently.
Additionally, keeping a close eye on your situation command gauges allows you to trigger powerful magic spells without consuming standard resource points. Combining these situational advantages with careful movement strategies helps balance your offensive output while keeping Sora safe from harm. Successfully mastering these advanced systems transforms the initial difficulty hurdle into a deeply rewarding tactical experience.

Strongest Characters In Demon Slayer Complete Power Ranking
The intricate power dynamic in Demon Slayer captures the imaginations of anime and manga fans globally, establishing a unique hierarchy between human swordsmen and immortal threats. Understanding the ultimate power ranking requires analyzing the historic peak abilities, biological enhancements, and specialized breathing techniques developed over centuries of warfare. This definitive guide breaks down the absolute pinnacle of martial prowess displayed throughout Koyoharu Gotouge's legendary narrative.
The Progenitor of Breathing Styles
Yoriichi Tsugikuni stands completely unparalleled at the absolute peak of the series, serving as the definitive baseline against which all combat capabilities are measured. As the inventor of Sun Breathing, his natural gift of the Demon Slayer Mark and the Transparent World allowed him to defeat the most terrifying threats effortlessly. His unmatched legacy shaped the entire history of the tactical conflict, remaining an unbeatable figure that no human or demon could ever hope to surpass in open combat.
His sheer speed and precision were so advanced that they permanently traumatized the core leadership of the demonic forces for generations. Even in his advanced old age, his movements remained flawless and lethal enough to threaten the strongest upper ranks instantly. The mythological aura surrounding his unmatched swordsmanship continues to serve as the golden standard for exceptional tactical performance across the entire lore.
The Absolute Master of Demons
Muzan Kibutsuji commands the secondary position of absolute dominance due to his unmatched biological immortality and devastating shape-shifting capabilities. As the original demon king, his physical constitution allows him to withstand standard decapitation while wielding whip-like appendages that destroy entire battlefields in seconds. His command over blood manipulation gives him total authority over his subordinates and grants him terrifying battlefield control against multiple opponents.
Overcoming his overwhelming power required a massive, coordinated effort involving complex chemical poisons and successive waves of elite warriors sacrificing their lives. His raw destructive output and instant regeneration capabilities make him a catastrophic force that completely breaks traditional rules of human engagement. While he lacked the absolute martial perfection of Yoriichi, his sheer survival instinct ensured his spot at the absolute apex of the modern era hierarchy.
The Upper Rank Vanguard
Kokushibo holds the definitive title of the strongest warrior beneath the demon king, beautifully blending elite human swordsmanship with terrifying demonic biology. As a former Sengoku era warrior who adopted Moon Breathing, his tactical arsenal was expanded over centuries of constant combat refinement. His unique ability to manifest crescent blades from his living flesh weapon makes his offensive patterns incredibly unpredictable and lethal for any standard defender.
Directly beneath him, upper ranks like Douma and Akaza showcase specialized combat arts that challenge the boundaries of human endurance. Douma utilizes cryogenic blood arts that neutralize breathing techniques entirely, while Akaza relies on pure destructive martial arts guided by an advanced battle compass. Their immense placement in the hierarchy highlights the severe threat level that the core human organization had to overcome during the final narrative arcs.
The Pinnacle of Human Resilience
Gyomei Himejima firmly establishes himself as the most powerful warrior among the modern human forces through sheer physical conditioning and tactical intelligence. Despite losing his sight, his mastery over his spiked flail and axe combination allows him to control space perfectly while utilizing the Transparent World system. His incredible defensive resilience and leadership capabilities proved absolutely vital during the most intense high-stakes skirmishes against the upper ranks.
Close behind him, protagonists like Tanjiro Kamado reached extraordinary heights by mastering the historic sun techniques during the final stages of the war. Through extreme dedication and awakening the historic marks, these elite human defenders proved that strategic synchronization can overcome biological disadvantages. Their placement in the ranking honors the indomitable spirit of humanity that ultimately brought an end to the ancient cycle of darkness.

AC Valhalla Closing The Vault Quest Walkthrough And...
Navigating the complex political landscape of Jorvik in Assassin's Creed Valhalla culminates in the high-stakes quest known as Closing the Vault. This crucial mission requires players to gather clues, investigate potential suspects, and ultimately unmask a hidden member of the Order of the Ancients during a tense Yuletide feast. Successfully resolving this storyline brings a satisfying end to the City of Greed narrative arc while testing your detective skills.
Investigating the Council Chambers
The quest begins with Eivor and Ljufvina deciding to search the personal offices of the city's council members. While the leaders are distracted by the winter festivities, you must carefully comb through their private quarters to uncover damning evidence. Exploring these restricted areas reveals hidden letters, financial logs, and strange physical clues that point toward a massive silver smuggling operation.
As you gather these testimonies, the narrative weight shifts heavily toward four prominent figures governing the region. Every piece of paper you interact with helps eliminate innocent parties while narrowing down the identity of the corrupt councilman. Paying close attention to the details found within these rooms ensures you have a solid understanding of the conspiracy before making your final accusation.
Identifying the Hidden Traitor
Once your investigation concludes, you must head directly to the Yuletide feast to confront the council members face-to-face. Eivor is forced to speak with each individual attendee to gauge their reactions and listen for slip-ups in their dialogue. It becomes clear that the mastermind behind the regional plot is none other than Audun, the trusted city treasurer.
Even if you mistakenly accuse someone else during the public confrontation, the story progression will inevitably reveal Audun's treasonous actions. However, correctly identifying him showcases your attention to detail and aligns perfectly with the clues discovered in the previous phase. Directly following this tense revelation, the celebratory atmosphere quickly transforms into a chaotic combat zone as Audun unleashes his guards.
Confronting Audun and Silver Choices
Defeating Audun requires aggressive combat tactics to quickly clear out his loyal guards before focusing down the main target. Once the battlefield settles, Eivor is presented with a unique choice regarding what to do with the recovered silver cache. You can choose to return the stolen riches directly to the people of Jorvik, keep the wealth for your own settlement, or let the council decide its fate.
Choosing to give the silver back to the citizens boosts your reputation as a benevolent leader and pleases your local allies. Stashing the coin for Ravensthorpe provides a small financial boost but leaves a slightly bitter taste among the local northern rulers. Regardless of your decision, the immediate threat to the region is successfully eliminated, securing a vital alliance for your clan.

Dwarf Seahorse Dave The Diver Location And Catching...
Exploring the ever-changing depths of the Blue Hole in Dave the Diver introduces players to a massive variety of unique marine life. Among the most elusive small creatures that players need to collect for specific side quests is the rare Dwarf Seahorse. Finding this tiny creature requires patience and a good eye, as its small size makes it blend perfectly into the underwater environment.
Navigating to the Right Biome and Depth
The Dwarf Seahorse does not roam the shallow waters where your diving journey initially begins. To track down this tiny marine creature, you must venture deeper into the Sea People Village region and its surrounding areas. Players usually report the best success when exploring depths between 150 and 250 meters where the environment changes significantly.
Paying close attention to specific environmental landmarks within this deep zone will drastically increase your efficiency. Many divers find success searching around the large, ancient whale skeleton embedded in the rocky ocean floor. Checking this specific location during your daily runs ensures you do not waste precious oxygen wandering aimlessly through empty water columns.
Spotting the Hidden Underwater Inscriptions
Because these creatures are incredibly small, they are often difficult to distinguish from standard background flora and coral structures. They tend to hide near unique environmental decorations, such as the ancient stone tablets and historical lore markers scattered across the seabed. Investigating these cultural ruins closely will often reveal a tiny moving shape clinging to the architecture.
Before you set out on your hunt, ensuring you have the correct equipment configuration is absolutely vital. You cannot simply grab these delicate creatures with your standard fishing harpoon or large nets without ruining the sample. Having the bug net unlocked and equipped allows Dave to safely scoop up the tiny organism without causing any damage.
Maximizing Your Catching Strategy and Efficiency
If you explore the designated deep zones and find that the creature has not appeared, you should not give up immediately. The spawning logic relies on random distribution variables that reset every time you initiate a new diving session from the surface boat. Simply returning to the restaurant and trying again the next morning will refresh the creature placements within the Blue Hole.
Capturing this creature is essential for completing the challenging Seahorse Festivity event and fulfilling unique restaurant recipes. Successfully bringing these rare specimens back to the surface boosts your establishment's reputation and unlocks advanced trading options with the Sea People. Keeping a steady supply of these small organisms ensures your business continues to thrive in the competitive culinary market.
Upgrading Your Dive Gear for Deep Exploration
Surviving the immense water pressure at these lower limits requires ongoing investment in your personal diving equipment. Prioritizing upgrades for your air tanks and protective suits allows you to spend more time investigating the ocean floor without facing emergency ascents. Enhanced logistics and proper planning turn a frustrating hunt into a highly rewarding expedition.
Balancing your daily restaurant duties with deep-sea exploration keeps the gameplay loop engaging and fresh. Every successful capture brings Dave closer to uncovering the ultimate mysteries hidden within the deep aquatic chasm. Mastering these gathering mechanics ensures you can complete every collection achievement with absolute confidence.

TOTK Treasure Of The Gerudo Desert Walkthrough
The Legend of Zelda: Tears of the Kingdom presents players with numerous secrets buried beneath the shifting sands of Hyrule. Among these hidden challenges is the Treasure of the Gerudo Desert side quest, a riddle-based objective given by Riju after completing the main regional crisis. Solving this puzzle requires a mix of environmental navigation, acute observation, and precise manipulation of historical structures. This walkthrough outlines the specific steps needed to uncover the ancient rewards waiting deep within the desert expanse.
Deciphering the Ancient Riddle
To initiate the quest, players must speak with Riju in Gerudo Town after restoring the region to its peaceful state. She provides a cryptic poem regarding a hidden treasure protected by giant statues and columns buried beneath the harsh sandstorms. The clues explicitly mention tracking a line extending from the gaze of the towering structures situated throughout the region. Understanding the orientation of these landmarks serves as your primary compass during the initial phase of exploration.Navigating the active sandstorm can significantly reduce your visibility, making standard map markers unreliable. Players should equip sand-traversal gear or utilize specific vehicles to maintain stability against the intense elements. Preparing high-grade elemental meals also ensures Link remains protected if the journey stretches into the extreme temperature hours.
Following the Silent Statues
The journey officially begins near the southern exit of Gerudo Town, where the first prominent marker stands. Players must carefully align their camera with the direction the stone figure faces to chart their traversal path. Moving directly along this vector will eventually lead you to a sequence of half-buried pillars emerging from the shifting dunes. Each pillar contains minor historical details that confirm you are following the correct ancestral path toward the ultimate burial chamber.At the third major junction point, a massive sinkhole disrupts the straightforward path outlined by the silent guides. Players must use their paraglider to safely drop into the rotating vortex without taking impact damage from the surrounding rocky walls. Descending into this specific subterranean opening transitions the quest into an underground cavern environment.
Exploring the Underground Chamber
Upon dropping through the sinkhole, players enter the hidden sanctuary known as the Gerudo Underground Ruins. This location features fragile stone walls that require blunt weapons or explosive materials to effectively clear the path forward. Navigating these narrow corridors requires caution, as hostile monsters frequently ambush explorers within the dark alcoves. Utilizing brightbloom seeds will illuminate the cavern and reveal hidden pressure plates embedded in the floor layout.Clearing the main blockage at the back of the cavern reveals a grand pedestal room housing a highly reinforced treasure chest. Opening this chest rewards players with the Vah Naboris Divine Helm, a powerful legacy armor piece that permanently boosts Link's electrical resistance. Securing this gear successfully concludes the historical questline and provides a vital asset for late-game combat encounters.

Wild Zone 5 Pokemon ZA Guide
The anticipation surrounding Pokémon Legends Z-A continues to grow as trainers prepare to dive back into the Kalos region and explore the urban mysteries of Lumiose City. Among the various sectors available for exploration, Wild Zone 5 stands out as a critical hub containing unique pocket monsters and vertical environments. Navigating this sprawling sector efficiently requires a solid understanding of its layout and the specific creature habitats hidden within its boundaries.
Unlocking Wild Zone 5 in Lumiose City
Accessing this vibrant sector requires players to progress through the main story campaign until the Bleu District officially opens up for urban redevelopment. Once you gain entry, you will immediately notice that the environment balances wide-open plazas with highly intricate structural designs. The layout presents several unique traversal challenges that distinguish it from the earlier zones encountered in the game.
Many players initially struggle to find the optimal paths through this district due to the sheer amount of vertical structures scattered across the map. Taking the time to observe the environmental markers will help you navigate the crowded streets without getting turned around. Early exploration in this area rewards patience as you unlock new entry points to the hidden corners of the sector.
Locating Rare Spawns and Rooftop Encounters
Wild Zone 5 is famous for its diverse selection of wild creatures, including popular species like Electrike, Pidgeotto, and Venipede. While some of these monsters roam the lower plazas, others require you to scale the architecture to initiate an encounter. Tracking down every single spawn point means checking both the ground level and the upper platforms thoroughly.
One of the most elusive targets in this district is Abra, which frequently spawns on the high rooftops marked by light blue indicators. To reach these elevated positions, trainers must utilize specialized climbing mechanics or partner with specific riding mounts. Securing these rooftop captures is essential for completionists looking to fully document the local ecosystem.
Strategic Tips for Navigating the Urban Terrain
The layout of this metropolitan wilderness features narrow alleyways and sudden elevation shifts that can easily obscure wild targets from view. Experienced trainers recommend moving cautiously through the denser sectors to avoid startling sensitive creatures before you can throw a Poké Ball. Utilizing stealth mechanics in the available cover areas will significantly increase your overall capture success rate.
It is also highly beneficial to map out the local fast travel points as soon as you discover them during your initial walkthrough. These landmarks save a massive amount of time when you need to return to specific habitats for resource farming or shiny hunting. By mastering the unique geography of Wild Zone 5, you can complete your regional collection and conquer the challenges of Lumiose City.